These adorable Chocolate Acorns were inspired by a treat my grandma used to make for our family gatherings. She had a knack for whipping up simple yet delightful snacks, and these were always a crowd-pleaser. With just a few ingredients and a touch of creativity, you can recreate these charming little acorns to bring some whimsy to your fall celebrations.
These Chocolate Acorns are not just cute; they’re also incredibly easy to make. Perfect for even the busiest weeknights, they’re ready in just about 35 minutes. A delightful treat the whole family will love, these acorns add a touch of autumnal magic to any occasion.
Why You’ll Love It
These Chocolate Acorns aren’t just fun to make; they’re a joy to behold! Their charming appearance makes them perfect for fall gatherings, Thanksgiving dessert tables, or simply an after-dinner treat. Their simplicity is a huge plus—just a handful of ingredients and minimal effort create impressive results. And the flavor? A perfect balance of crunchy cookie, smooth milk chocolate, and a dark chocolate accent that’s purely delightful.
Print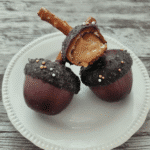
Chocolate Acorns
- Total Time: 15 mins
- Yield: 50 acorns
Description
These charming Chocolate Acorns are a delightful fall treat, combining the crunch of mini Nilla wafers with the smooth sweetness of milk chocolate. Easy to make and even more fun to eat, they’re perfect for parties, packed lunches, or a simple after-dinner indulgence. A touch of whimsy for your autumn celebrations.
Ingredients
- 1/2 cup semisweet chocolate chips
- 50 mini Nilla wafer cookies
- 50 milk chocolate Hershey’s kisses, unwrapped
- 50 mini chocolate chips
Instructions
- Prep the Chocolate: Line a baking sheet with parchment paper. Melt semisweet chocolate chips in a microwave-safe bowl in 45-second intervals, stirring until smooth. Transfer to a Ziploc bag and snip a tiny corner.
- Assemble the Acorns: Pipe melted chocolate onto each wafer, press a Hershey’s Kiss on top, and place on the baking sheet.
- Chill to Set: Freeze for 5 minutes.
- Create the Stems: Pipe chocolate onto mini chocolate chips and attach to the wafer tops.
- Final Chill: Freeze for another 5 minutes.
Notes
Ensure the melted chocolate isn’t too hot to prevent burning. If it thickens during assembly, reheat gently. For a smoother finish, use a double boiler to melt the chocolate instead of a microwave. Mini chocolate chips can be substituted with chopped nuts or sprinkles for the stems.
- Prep Time: 10 mins
- Cook Time: 5 mins
- Category: Dessert
- Method: No-Bake
- Cuisine: American
Ingredient Overview

Here’s your shopping list. It’s short and sweet, making these acorns an easy, budget-friendly treat:
- 1/2 cup semisweet chocolate chips: These will be melted to form the “glue” and the acorn tops.
- 50 mini Nilla wafer cookies: These form the body of the acorns, providing a lovely vanilla flavor and a satisfying crunch.
- 50 milk chocolate Hershey’s kisses, unwrapped: These classic candies are the perfect shape and size for acorn caps.
- 50 mini chocolate chips: These tiny morsels become the acorn stems, adding a final touch of realism.
Step-by-Step Instructions
Step 1: Prep the Chocolate
Line a baking sheet with parchment paper and set it aside. Place the semisweet chocolate chips in a small, microwave-safe bowl. Microwave in 45-second intervals, stirring until smooth after each interval. Be careful not to overheat the chocolate. Transfer the melted chocolate to a small Ziploc bag and snip off a tiny corner.
Step 2: Assemble the Acorns
Pipe a small amount of melted chocolate onto the flat side of each mini Nilla wafer. Immediately press an unwrapped Hershey’s Kiss on top, attaching it to the cookie. Place the assembled acorn, cookie-side down, on the prepared baking sheet.
Step 3: Chill to Set
Repeat Step 2 until all cookies and kisses are assembled. Place the baking sheet in the freezer for about 5 minutes to allow the chocolate to set.
Step 4: Create the Stems
Pipe a dab of melted chocolate onto a mini chocolate chip and attach it to the top of the wafer to create the stem. Repeat for all the acorns.
Step 5: Final Chill
Return the baking sheet to the freezer for another 5 minutes to allow the stems to set completely.
Pro Tips

- Use high-quality chocolate chips for the best melting and flavor. If you are a frequent baker you should check out some of our baking tips found on the Desserts page.
- If the melted chocolate becomes too thick, gently reheat it in the microwave in short bursts, stirring until smooth.
- For a festive touch, add a sprinkle of edible glitter to the acorns before the chocolate sets.
Recipe Variations
- Nutty Acorns: Use peanut butter chips instead of semisweet chocolate for a nutty twist. Try our recipe for delicious Tanghulu.
- White Chocolate Wonders: Substitute white chocolate chips for the semisweet chocolate and use white chocolate kisses for a snowy acorn look.
- Sprinkled Acorns: Before the chocolate sets, add a sprinkle of chopped nuts, sprinkles, or colored sugar for extra texture and visual appeal.
How should I store these Chocolate Acorns?
Store the Chocolate Acorns in an airtight container at room temperature for up to 3 days or in the freezer for up to 2 weeks.
Can I use different types of cookies?
While mini Nilla wafers work best, you can experiment with other small, round cookies like mini graham crackers or shortbread cookies.
What if I don’t have a piping bag?
If you don’t have a piping bag or Ziploc bag, you can use a small spoon or a toothpick to apply the melted chocolate.
Can I make these ahead of time?
Absolutely! These Chocolate Acorns are perfect for making ahead. Store them in an airtight container in the freezer and take them out about 15 minutes before serving.
Serving Suggestions

These Chocolate Acorns are delightful on their own but can also be incorporated into other treats. Try using them as cake or cupcake toppers, or scattering them over a bowl of ice cream. They’re also a fun addition to dessert platters or packed lunches. For other great Korean dishes check out our amazing Lunch options.
Final Thoughts
These Chocolate Acorns are a simple, fun, and delicious treat that’s perfect for any fall occasion. Give them a try and watch them disappear in a flash! If you enjoyed this recipe, you might also like our Breakfast options. Don’t forget to share your Chocolate Acorn creations with me on social media! You can find me on Pinterest, Instagram, and Facebook.


