My kids always get excited when the leaves start changing colors. It’s a sure sign that Halloween is just around the corner, which means it’s time for festive treats like these Pumpkin Patch Brownies! These delightful brownies are not only delicious but also super fun to make, especially with little helpers. Get ready for a fun baking adventure!

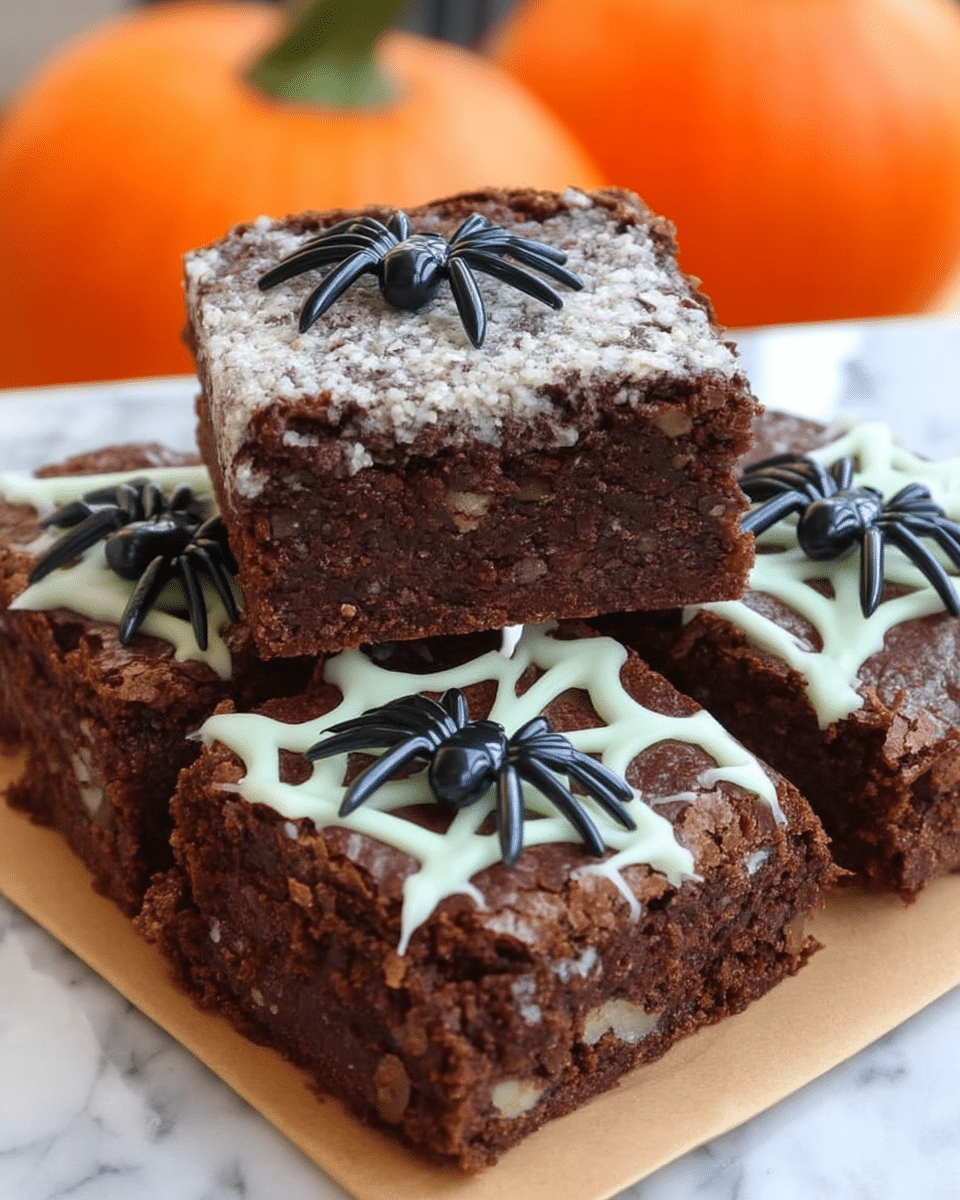
With a fudgy brownie base, vibrant green frosting vines, and adorable mini pumpkin candies, these treats capture the spirit of fall perfectly. Whether you’re hosting a Halloween party, packing a spooky lunchbox surprise, or simply craving a touch of autumnal sweetness, these Pumpkin Patch Brownies are a guaranteed winner!
Why You’ll Love It
These Pumpkin Patch Brownies aren’t just cute; they’re packed with deliciousness! The rich, fudgy brownie base is the perfect canvas for the sweet, creamy green frosting and adorable mini pumpkins. They’re incredibly easy to make, perfect for bakers of all levels, especially if you’re short on time. Plus, these brownies are guaranteed to bring a smile to everyone’s face – they’re a festive and fun treat for all ages!
Print
Pumpkin Patch Brownies
- Total Time: 40 mins
- Yield: 12 brownies
Description
Festive Pumpkin Patch Brownies are a delightful fall treat, combining a rich, fudgy brownie base with sweet green frosting “vines” and adorable mini pumpkin candies. Easy to make and perfect for Halloween parties, lunchbox surprises, or any autumn occasion.
Ingredients
- One box of your favorite brownie mix (plus the ingredients listed on the box – usually eggs, oil, and water)
- 1/2 cup green frosting (you can buy this pre-colored or tint your own with food coloring)
- 12 mini pumpkin candies
Instructions
- Preheat oven and grease/flour a square baking pan (8×8 or 9×9 inches).
- Prepare brownie batter according to package directions.
- Pour batter into the prepared pan, spread evenly, and bake as directed.
- Let brownies cool completely in the pan.
- Frost the entire surface with green frosting, creating swirls and lines to resemble vines.
- Place a mini pumpkin candy on each brownie.
- Cut into squares and serve.
Notes
For extra fudgy brownies, slightly underbake them. A toothpick inserted should come out with a few moist crumbs. If using homemade frosting, ensure it’s thick enough to hold its shape. For a fun variation, arrange the mini pumpkins in a circle to create a pumpkin patch effect.
- Prep Time: 15 mins
- Cook Time: 25 mins
- Category: Desserts
- Method: Baking
- Cuisine: American
Ingredient Lowdown

Let’s gather our ingredients! You’ll need just a few simple items to bring these adorable pumpkin patch brownies to life:
- One box of your favorite brownie mix (plus the ingredients listed on the box – usually eggs, oil, and water)
- 1/2 cup green frosting (you can buy this pre-colored or tint your own with food coloring)
- 12 mini pumpkin candies (look for these in the seasonal aisle of your grocery store)
That’s it! See, super simple. Don’t be afraid to customize with different brownie mix flavors or candy toppings. Now, let’s get baking!
From Start to Finish
Step 1: Prep the Brownie Base
Preheat your oven according to the instructions on the brownie mix box. Grease and flour a square baking pan (8×8 or 9×9 inches). This will help your brownies release easily.
Step 2: Mix the Brownie Batter
Prepare the brownie batter according to the package directions. Be sure to mix everything thoroughly until just combined – overmixing can lead to tough brownies.
Step 3: Bake the Brownies
Pour the brownie batter into your prepared pan and spread evenly. Bake for the time recommended on the box, or until a toothpick inserted into the center comes out with just a few moist crumbs attached. Avoid overbaking!
Step 4: Cooling Time
Let the brownies cool completely in the pan before frosting. This is crucial for preventing a sticky situation!
Step 5: Create the Pumpkin Patch
Once the brownies are cool, frost the entire surface with the green frosting, creating swirls and lines to resemble vines. Place a mini pumpkin candy on each brownie to complete the pumpkin patch scene.
Step 6: Cut and Serve
Cut the frosted brownies into squares and serve. Get ready for smiles all around!
Better-Than-Grandma Tips

Here are a few tips to make your Pumpkin Patch Brownies extra special:
- Cooling is Key: Let the brownies cool completely before frosting to prevent a melty mess. Trust me, patience is rewarded with neat and tidy pumpkin patches!
- Frosting Fun: Get creative with your frosting! You can spread it evenly or pipe it on for a more detailed vine effect. Check out our tips on frosting cakes and cupcakes for some inspiration.
- Candy Choices: While mini pumpkin candies are classic, feel free to experiment with other Halloween treats like candy corn, spooky sprinkles, or even small chocolate chips.
Switch-Ups & Swaps
- Chocolate Lovers: Use a chocolate fudge brownie mix for an extra rich flavor.
- Nutty Delight: Add chopped walnuts or pecans to the brownie batter for some added crunch.
- Spice It Up: Include a teaspoon of pumpkin pie spice in the batter for a warm, autumnal flavor.
- Cream Cheese Swirl: Swirl in some softened cream cheese before baking for a tangy twist. You can find some helpful tips on our cheesecake brownies recipe.
- Different Candies: Instead of mini pumpkins, use candy corn, Halloween-themed M&Ms, or other festive candies.
How do you make these brownies look like a pumpkin patch?
These brownies get their festive look from a simple green frosting “vine” design and store-bought mini pumpkin candies. You could also use candy corn, Halloween-themed sprinkles, or even melted chocolate to draw spooky faces.
Can I use my own brownie recipe instead of a mix?
Absolutely! Brownie mix offers a convenient shortcut, but feel free to use your favorite homemade brownie recipe if you prefer.
How should I store these brownies?
These brownies are best served at room temperature. If you need to store them, keep them in an airtight container at room temperature for up to 3 days or in the refrigerator for up to 5 days. Bring them back to room temperature for optimal flavor and texture.
Can I make these brownies for other holidays?
You can adapt the pumpkin patch theme to other holidays! For Christmas, use red and green frosting for holly berries, or for Thanksgiving, create a “cornucopia” design with candy corn and other fall-themed treats.
How to Serve

These Pumpkin Patch Brownies are perfect for any fall gathering. Serve them on a platter with other Halloween treats, or pack them in lunchboxes for a fun surprise. They also make delightful gifts for friends and neighbors! Pair them with a scoop of vanilla ice cream or a warm mug of hot chocolate for a cozy autumn treat. For more delicious dessert ideas, take a look at our dessert recipes.
That’s a Wrap
These Pumpkin Patch Brownies are the perfect sweet treat to share with friends and family during the spooky season! Their charming design and delicious, fudgy flavor are sure to be a hit. Don’t forget to snap a picture before they disappear! For more festive treats, explore our Desserts category. Share your own pumpkin patch creations with me on social media – I can’t wait to see them!
