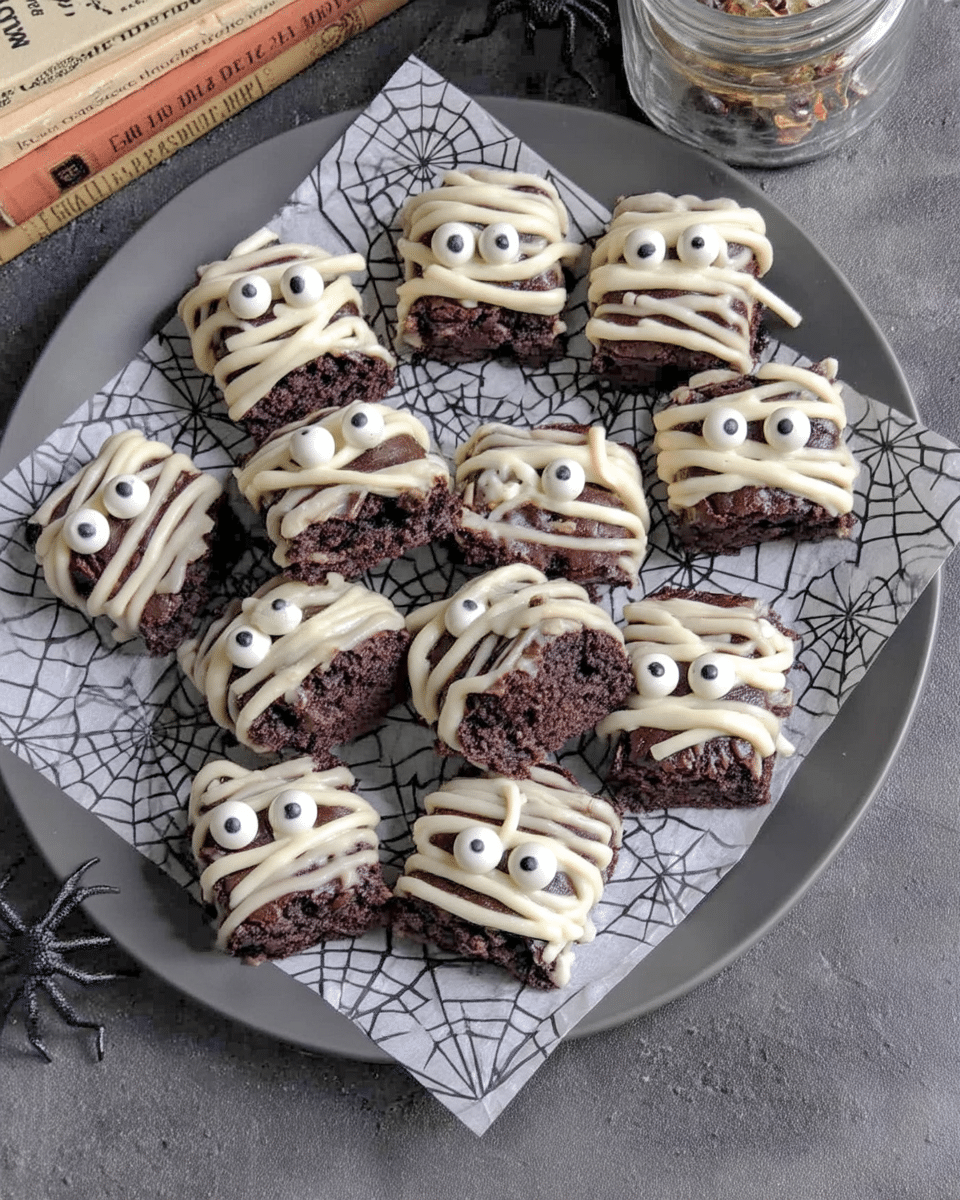
Last Halloween, my little niece, Lily, declared that she wanted “mummy brownies.” I wasn’t sure what she envisioned, but together, we created these Spooky Mummy Brownies! They were an instant family favorite, and now Lily requests them year-round. The combination of fudgy, chewy brownies, sweet white chocolate, and googly candy eyes creates a fun twist on classic brownies that’s sure to be a hit with everyone.
These Spooky Mummy Brownies are surprisingly easy to make, even if you’re a beginner baker. They start with a simple, one-bowl brownie base that mixes up quickly. The white chocolate drizzle and candy eyes add a touch of spooky fun without requiring any special decorating skills. You can even get the kids involved in placing the candy eyes—they’ll love helping bring these mummies to life!
Why You’ll Love These Spooky Mummy Brownies
These Spooky Mummy Brownies are more than just a sweet treat; they’re an experience. They are:
- Super easy: A simple, one-bowl brownie base that bakes to perfection every time, and you hand mix them for convenience!
- Festive Fun: With their sweet white chocolate “bandages” and quirky candy eyes, these brownies are the perfect addition to any Halloween party or spooky movie night.
- Kid-friendly: Little ones will love helping assemble these adorable mummies. It’s a fun and interactive baking project for the whole family.
- Rich and Delicious: The combination of fudgy brownies, sweet white chocolate, and a hint of vanilla is a flavor sensation that will have everyone coming back for more.
Spooky Mummy Brownies
- Total Time: 55 mins
- Yield: 16 brownies
Description
These fun and festive Spooky Mummy Brownies are a delicious twist on a classic treat. With a fudgy brownie base, a sweet white chocolate drizzle, and googly candy eyes, they’re perfect for Halloween or any spooky occasion. Easy to make and even more fun to decorate, these brownies are a guaranteed hit with kids and adults alike.
Ingredients
- ½ cup (113g) unsalted butter
- ¼ cup (45g) semi-sweet chocolate chips
- 2 large eggs
- 2 teaspoons pure vanilla extract
- ¾ cup (94g) all-purpose flour
- ½ cup (100g) granulated sugar
- ½ cup (100g) packed light brown sugar
- ⅓ cup (33g) Dutch process cocoa powder
- ¼ teaspoon salt
- 1 cup (175g) white chocolate chips (or white candy melts)
- 32 candy eyes
Instructions
- Melt the butter and semi-sweet chocolate chips in a microwave-safe bowl in 30-second intervals, stirring until smooth.
- Whisk together the flour, granulated sugar, brown sugar, cocoa powder, and salt in a separate bowl.
- Whisk the eggs and vanilla extract into the melted butter and chocolate mixture.
- Gradually add the dry ingredients to the wet ingredients, mixing gently until just combined.
- Preheat oven to 350°F (175°C). Line a 9×9 inch baking pan with parchment paper.
- Pour batter into the prepared pan, bake for 30-35 minutes, and cool completely.
- Cut the cooled brownies into 16 squares.
- Melt the white chocolate chips in a microwave-safe bowl in 30-second intervals, stirring until smooth.
- Transfer melted white chocolate to a zip-top bag, snip a corner, and drizzle over brownies to create a “mummy bandage” effect, placing two candy eyes on each brownie.
- Let the white chocolate set before serving.
Notes
For a richer flavor, use high-quality dark chocolate. If you don’t have candy eyes, try using mini chocolate chips or sprinkles for decoration. These brownies are best enjoyed fresh but can be stored in an airtight container at room temperature for up to 3 days. To make them ahead of time, bake the brownies and let them cool completely, then store them undecorated. Melt the white chocolate and decorate just before serving.
- Prep Time: 20 mins
- Cook Time: 35 mins
- Category: Dessert
- Method: Baking
- Cuisine: American
Ingredient Lowdown
Here’s a glimpse of what you’ll need to create these delightful Spooky Mummy Brownies. Many of these items you likely have on hand now. Gather them together to make your baking session even more efficient.
For the Brownies:
- ½ cup (113g) unsalted butter
- ¼ cup (45g) semi-sweet chocolate chips
- 2 large eggs
- 2 teaspoons pure vanilla extract
- ¾ cup (94g) all-purpose flour
- ½ cup (100g) granulated sugar
- ½ cup (100g) packed light brown sugar
- ⅓ cup (33g) Dutch process cocoa powder
- ¼ teaspoon salt
For the Mummy Decoration:
- 1 cup (175g) white chocolate chips (or white candy melts)
- 32 candy eyes
Step-by-Step Instructions
Step 1: Melt the Chocolate and Butter
In a large microwave-safe bowl, combine the butter and semi-sweet chocolate chips. Microwave in 30-second intervals, stirring after each interval, until the butter and chocolate are melted and smooth. Be careful not to overheat.
Step 2: Combine the Dry Ingredients
In a separate bowl, whisk together the flour, granulated sugar, brown sugar, cocoa powder, and salt. Make sure everything is well combined.
Step 3: Mix the Wet Ingredients
In the bowl with the melted butter and chocolate, whisk in the eggs and vanilla extract until thoroughly combined. The mixture should be smooth.
Step 4: Combine Wet and Dry Ingredients
Gradually add the dry ingredients to the wet ingredients, mixing gently with a spatula or wooden spoon until just combined. Be careful not to overmix, which can lead to tough brownies. Hand mixing will give you nice, evenly sized brownies.
Step 5: Bake the Brownies
Preheat your oven to 350°F (175°C). Line a 9×9 inch baking pan with parchment paper, leaving some overhang on the sides to make lifting the brownies out easier. Pour the brownie batter into the prepared pan and spread evenly. Bake for 30-35 minutes, or until a toothpick inserted into the center comes out with just a few moist crumbs attached. Do not overbake.
Step 6: Cool and Slice
Let the brownies cool in the pan for 5 minutes before lifting them out using the parchment paper overhang. Transfer to a wire rack to cool completely, about 30 minutes, before slicing. Once cooled, cut the brownies into 16 equal squares (4 rows by 4 rows).
Step 7: Melt the White Chocolate
In a microwave-safe bowl, melt the white chocolate chips (or candy melts) in 30-second intervals, stirring after each, until smooth. Be careful not to overheat, as white chocolate can scorch easily.
Step 8: Decorate the Mummies
Transfer the melted white chocolate to a small zip-top bag. Snip a tiny corner off the bag to create a piping bag. Place two candy eyes on each brownie square. Drizzle the white chocolate back and forth across each brownie, starting at the top and working your way down, to create a “mummy bandage” effect. Make sure the chocolate touches the candy eyes to help secure them in place.
Step 9: Set and Serve
Let the white chocolate set completely, about 10-15 minutes, before serving or storing. These Spooky Mummy Brownies are best enjoyed within a few days.
Better-Than-Grandma Tips
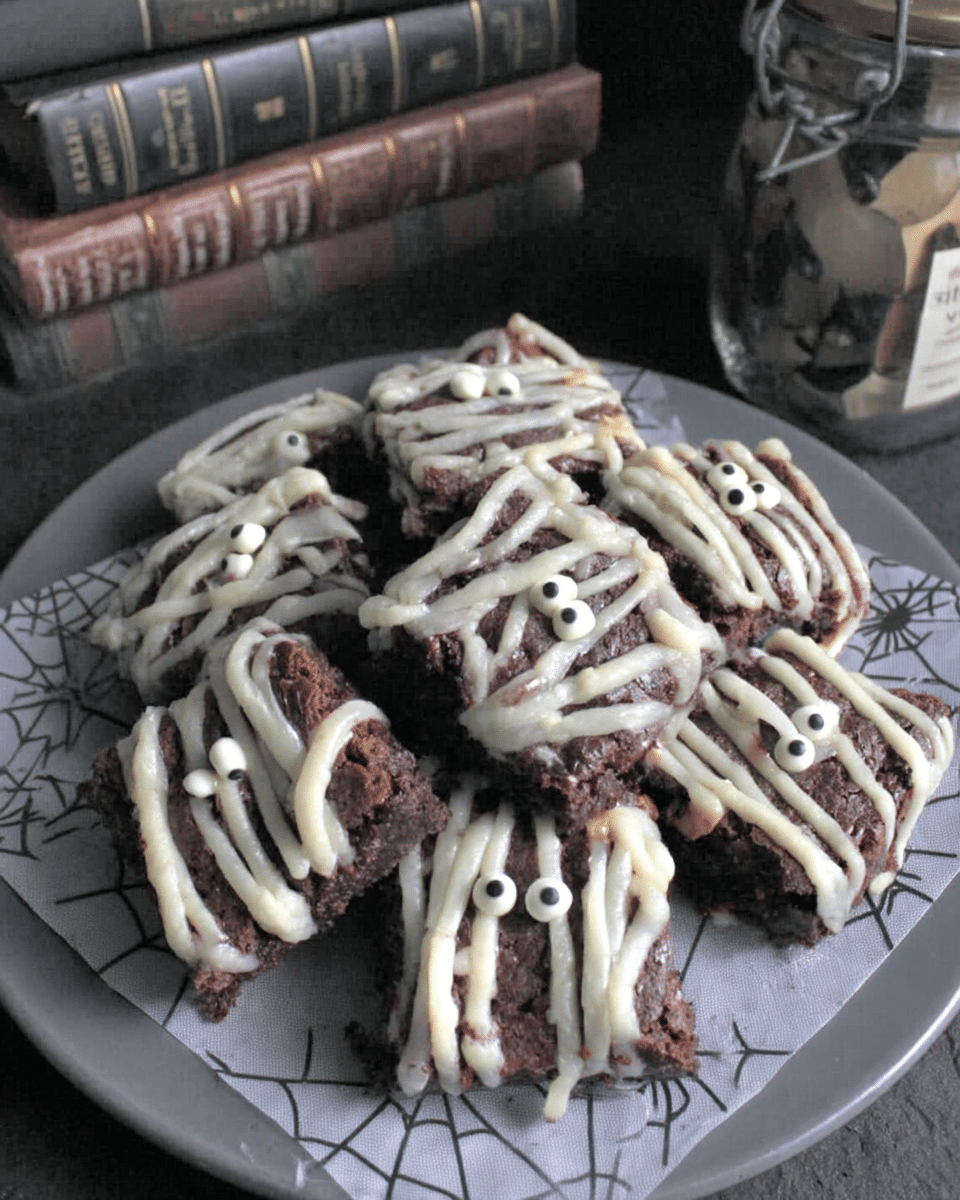
Here are a few tips for creating the best Spooky Mummy Brownies:
- Use high-quality chocolate: The better the chocolate, the better the brownies will taste. I recommend using good quality semi-sweet chocolate chips and white chocolate chips or candy melts.
- Don’t overmix the batter: Overmixing can develop the gluten in the flour, which will result in tough brownies. Mix until the ingredients are just combined.
- Line your baking pan: Lining the baking pan with parchment paper makes it super easy to remove the brownies from the pan once they’re cooled. See how I line a pan with our Peanut Butter Brownies recipe.
- Cool completely before slicing: This will prevent the brownies from crumbling when you cut them and make it easier to decorate them.
- Get creative with the decorations: While candy eyes are classic, you can use other small candies or sprinkles to decorate your mummies. A contrasting color of sprinkles would be especially festive!
Try These Variations
- Nutty Mummies: Add ½ cup of chopped nuts, such as walnuts or pecans, to the brownie batter before baking for added crunch and flavor.
- Chocolate Chunk Mummies: Use milk chocolate chips or dark chocolate chunks instead of semi-sweet chocolate chips for a different flavor profile. You can also swap out the white chocolate drizzle for dark chocolate or butterscotch for more variety!
- Blondie Mummies: Make blondies instead of brownies! Replace the cocoa powder with an equal amount of flour and follow the rest of the recipe as directed. For the blondie mummy recipe, visit our page for blondies.
- Swirly Mummies: Once you add the brownie batter to the pan, add dollops of peanut butter and use a toothpick or knife to swirl throughout the batter for a delicious peanut butter swirl!
What is the most expensive brownie?
The most expensive brownie ever sold was created by a luxury hotel and priced at over $1,000. It included extravagant ingredients like rare chocolate, edible gold, and exotic nuts.
What does Dr Pepper do to brownies?
Adding Dr Pepper to brownie batter can create a unique, slightly tangy flavor and a more moist, cake-like texture. The carbonation in the soda can also help make the brownies lighter.
Make It a Meal
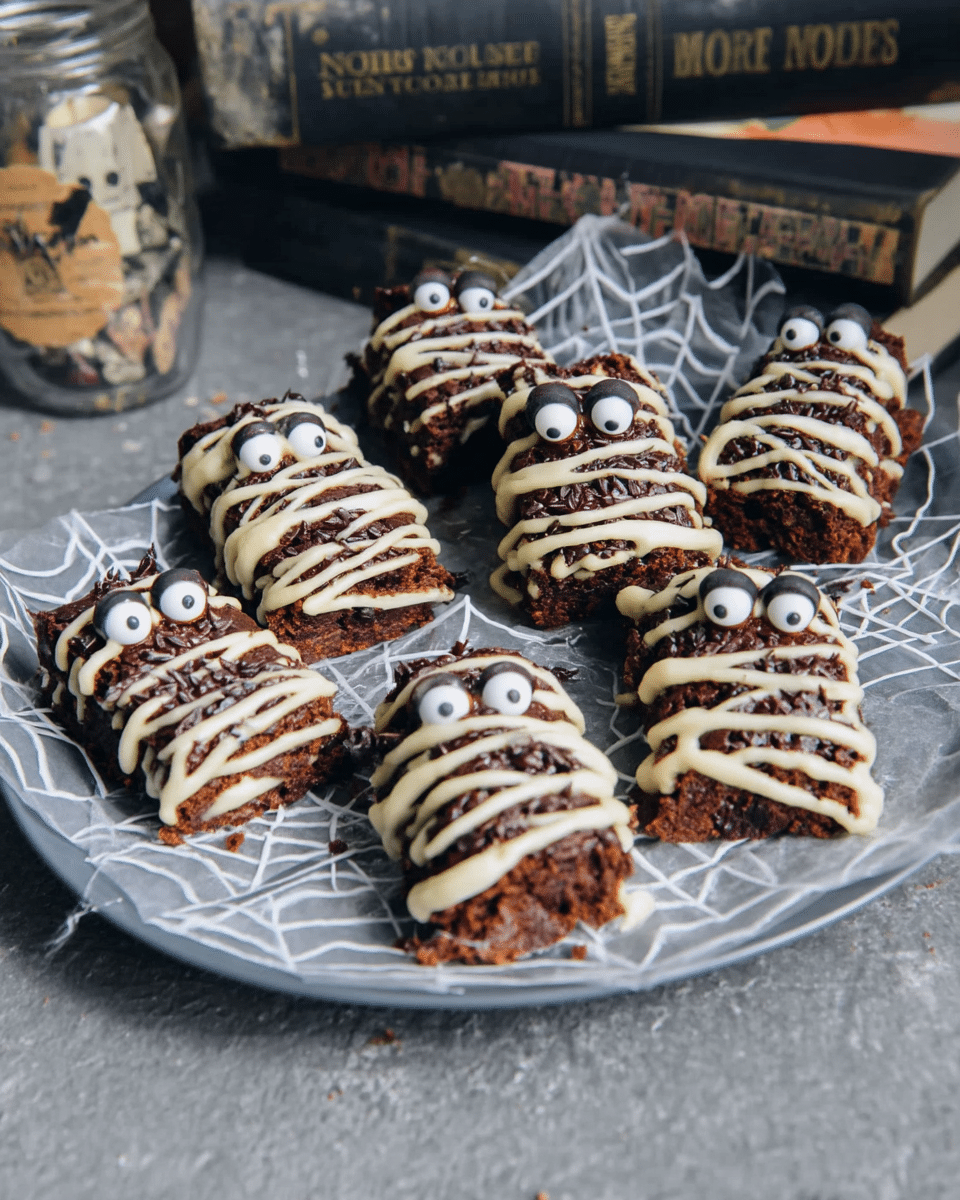
These Spooky Mummy Brownies are perfect on their own, but here are a few ideas for how to elevate them:
- A la mode: Top a warm brownie with a scoop of vanilla ice cream and a drizzle of chocolate sauce for a decadent dessert.
- Milk and cookies, but spooky: Serve these brownies with a tall glass of cold milk for a classic treat. Or how about hot cocoa?
- Party platter: Include these Spooky Mummy Brownies on a dessert platter with other Halloween treats, such as cookies, cupcakes, and candy. See our Halloween Dessert Ideas page for inspiration.
- Gift them: Package these adorable mummies in a festive box or bag and give them as a fun and tasty Halloween gift to friends, family, or coworkers.
That’s a Wrap!
These Spooky Mummy Brownies are a fun, easy, and delicious treat that everyone will love! They’re perfect for Halloween parties, spooky movie nights, or any occasion that calls for a little festive fun. Feel free to experiment with different variations and toppings to create your own unique mummy creations! Now, go forth and bake some spooky sweetness—and don’t forget to share your creations with us! We can’t wait to see what you come up with.
For more spooky and festive treats, be sure to check out our Halloween recipe collection.
Connect with us on social media for even more delicious inspiration:

